How it Works
If you are new to Let’s Encrypt, here is a quick breakdown of how each service works together to automate certificate renewals. At first, it can seem a little daunting, but over time the process becomes clear.
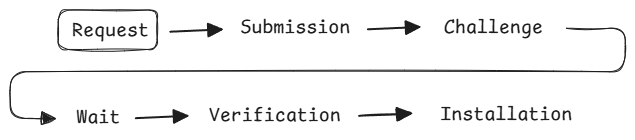

Request
Using an ACME client installed on your host (Posh-ACME or Certbot for example), you request a certificate; say for example: twobyte.blog, as we want to protect this website with an SSL certificate.
Example request using certbot.
certbot certonly -d twobyte.blog -d www.twobyte.blog -m [email protected] --agree-tosExample using Posh-ACME.
    $certParams = @{
        Domain = @(twobyte.blog, www.twobyte.blog)
        PfxPass = 'changeme'
        AcceptTOS = $true
        Install = $true
        Contact = [email protected]
        Verbose = $true
    }

    New-PACertificate @certParams
Submission
The ACME client creates a private certificate for the requested domain(s).
privkey.pemThis certificate always stays on the host and is protected from being accessed. It’s imperative this file never be publicly accessible as it can be used to impersonate your website.
Alongside the private certificate, another file is generated called a Certificate Signing Request (CSR).
cert.csrThis file, generated from your private certificate, can be safely given to a Certificate Authority (aka. Let’s Encrypt) for signing. The signed certificate you receive in return is the public certificate which will be installed on your website to allow for SSL connections.
cert.pemUnderstanding these files, the ACME client submits the Certificate Signing Request (CSR) to Let’s Encrypt for signing.


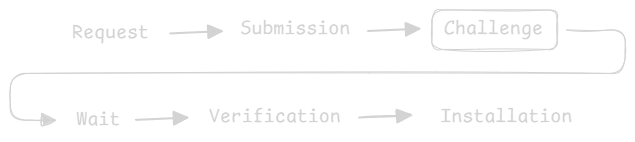
Challenge
Unfortunately (or fortunately) Let’s Encrypt cannot just sign any certificate as that would void one of the main benefits of a certificate: identification.
To verify you own the domain specified within the Certificate Signing Request, Let’s Encrypt provides a challenge you must complete. Typically you’ll see the challenge one of two ways:
- HTTP Challenge - A file containing a specific value must be made publicly accessible on your website.
- DNS Challenge - A DNS record must respond with a specific value.
To complete this challenge, the ACME client generates the requested file, or if configured to use DNS validation, creates the required DNS record via a plugin.
For example, in the following two articles, we’ll use the CloudFlare plugin to validate our domain(s). This plugin, installed alongside the ACME client, allows the ACME client to update DNS records via CloudFlare’s API.
Wait
To ensure the DNS record is available when Let’s Encrypt reads it, the ACME client waits two minutes, after which the ACME client informs Let’s Encryt that the challenge has been completed.
If using the HTTP challenge, this wait isn’t necessary.
Verification
Let’s Encrypt verifies the challenge. If found to be correct, it proceeds with generating a signed certificate based off of the Certificate Signing Request (CSR). The resulting file is passed down to the ACME client for installation.
Installation
Success! We now have a signed certificate for our domain. The ACME client takes this signed certificate and saves it locally ready for use by any application/service.
user@host:/$ ls /etc/letsencrypt/live/twobyte.blog/
README cert.pem chain.pem fullchain.pem privkey.pemprivkey.pemis your private certificate.cert.pemis your public certificate.chain.pemis any required intermediary certificate(s) associated with Let’s Encrypt.fullchain.pemis the intermediary certificate(s) and public certificates bundled together in one file.